Because this year was the 3D re-release of The Phantom Menace I decided to make Padme's Tatooine disguise for it. I didn't finish by the time the movie came back out unfortunately but I decided that I needed to get it done this year - preferably this spring. I finally finished it (for now cause I know myself there will be tinkering and updating as I use it) tonight. This was probably the easiest Padme costume I have ever done. It didn't take too long to sew but the belt slowed everything down.
I started by looking for dye-able fabric that was the right texture as the original was loosely woven but had to be able to stay together and withstand the rigors of trooping. I found two different silks in a home textiles shop down in New Jersey. One has a small rough looking weave, the other has thicker threads in a more open weave. The were both white so I started by cutting off enough of the smaller weave fabric to make the arm wraps and set it aside. I then dyed the rest of the small weave blue using Dylon Ocean Blue.
 |
| The Fabrics Un-dyed |
 |
| The blue dye bath |
 |
| Finished blue fabric |
I then dyed the rest of the small weave fabric grey with Tulip light grey dye and attempted to dye the loose weave fabric with the same dyebath, However the Tulip was not strong enough to color the thicker fibers enough and the smell was HORRIBLE. So I went back and bought Rit Pearl Grey powdered dye and re-dyed the loose weave fabric which did work.
 |
| Grey dye bath |
Once I had the fabric the way I wanted it I started putting together the tunics first. I used Simplicity 3568 view A shortened to the view C length for the blue under-tunic. I didn't change much at all as it was already so close, however I did lengthen the sleeves a little bit and add elastic to the wrists that is tucked under to give the folded under look of the original costume. Since there was a bit of variation in the blue due most likely to overcrowding in my dye pot, I cut the belt off first as it was one long evenly colored piece, then I cut out and pieced together the under tunic following the pattern's directions. While my machine was still threaded blue I folded the strip I cut for the belt in half and sewed up two of the sides, turned it inside out and sewed up the last side to make a tube with all the rough edges inside for a neat looking belt. I added snaps to one end and the point that reached it when I wrapped it around my waist (it wasn't quite long enough to tie on).
 |
| undertunic with flash |
 |
| without flash |
I then used Butterick 4523 for the over tunic. I had to do a lot of alteration on it. The pattern had two lengths, I used the shorter one but it also called for slits on the sides and in the front and the back which I took out. The front was supposed to be cut in 2 pieces and then sewn together with a center seam (the back was as well). I cut them both on the fold to eliminate that seam and then sewed up what should have been slits on the side seams when I put them together. Instead of facing the neck and arm holes I did a wrap over so it looked piped like the original. I was careful to measure the length on myself and adjusted it to get the right look as the pattern wasn't as exact as I wanted. I then stitched up the arm wraps the same way as the belt but just put snaps on the top end.
For the pants I took a pair of crinkle cotton pants that I had been using for my Jedi (I found a better pair to replace them for that) and dyed them purple using a full bottle of purple Rit mixed with a half bottle of wine Rit. I also redyed the rest of the blue small weave fabric (I left the pants in for a long time, the silk I only dipped in briefly). (Tip: I always heat set my dyed fabric in the dryer on warm before sewing with it or washing it). I cut the silk into strips and sewed them up in the same way that I did the belt and arm wraps for the leg wraps (I did have to sew 3 strips together end to end for each to make them long enough - I measured that out by testing it repeatedly before making the tubes.) I sewed snaps on my shoes and on the leg wraps to keep them in place. For the shoes I actually got indoor/outdoor slippers - they are SOOOOO comfortable! They are leather so it was hard to get the needle through, and hurt my fingers - A LOT, but it holds the fabric well and makes it very easy to wear.
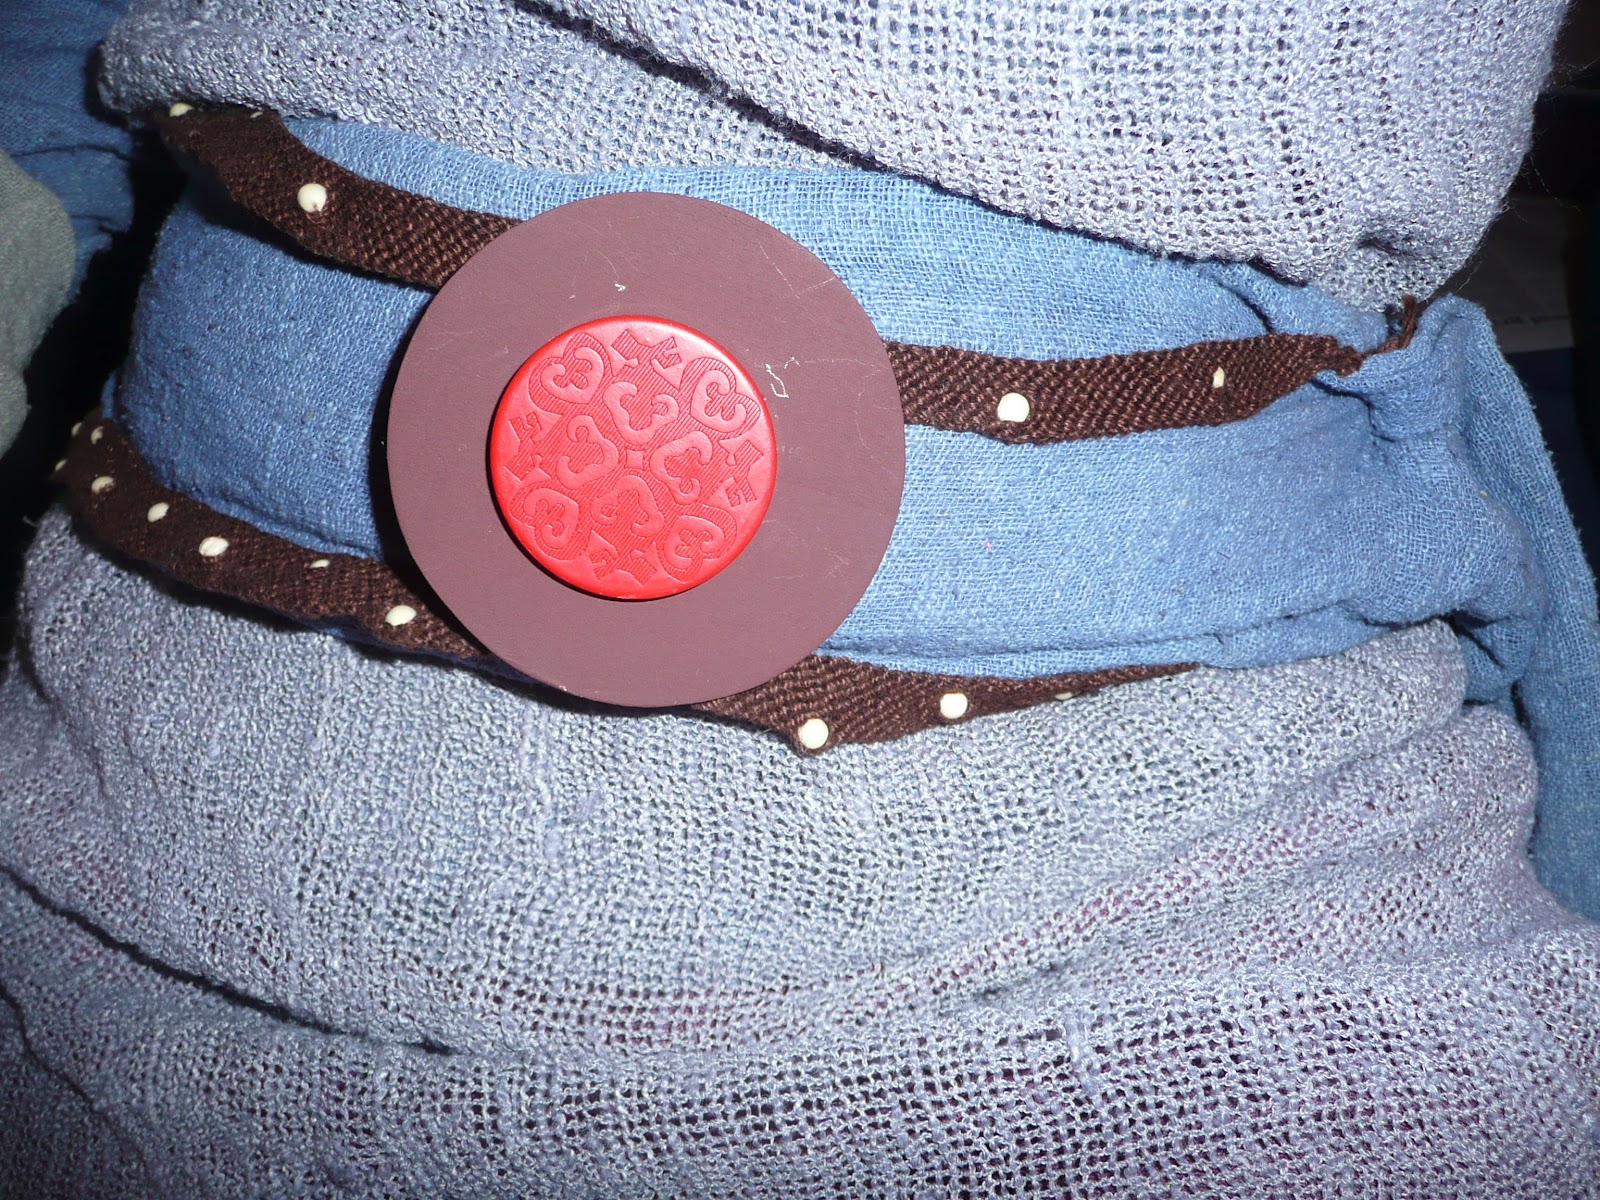
The last couple of pieces are the belt pieces. The center stone was easy. It appears slightly textured so I bought a large textured button and a plastic paint pen and painted it red. It took a couple of coats but it did stick very well. I then bought a little wooden circle at JoAnns, my sister helped me drill a hole for the back of the button in it and I painted it the dark brown to match the edge of the stone. I hot glued the wooden circle onto the back of the button after threading the button onto a thin string. For the brown macrame'ed parts of the belt, I bought "chocolate" colored crochet yarn and cut 5 strings each about 3 wingspans long (aka hold one end on one hand and the ball in the other and stretch both arms out to the side as far as you can - that is one wingspan) I folded them in half and tied a knot leaving a small loop, and giving myself 10 strings to work with. I then started an epic friendship bracelet. I used the 4 knot system (you take a guide string and a working string and make a number 4 with the working string over the guide string and wrap the tail of the working string around the guide string and then through the opening in the 4 and pull the working string up and the guide string down, do this twice for each knot to keep them strong) and the rag rug pattern - tie every other thread over its neighbors (odd numbered ones if you laid them out in a line flat on the table over the even numbered ones) then tie a knot in between each of those pairs (even over odd if you renumbered so the slots maintained their number instead of the string). Continue this pattern to the end. I added the lighter colored bits by randomly adding small pale tan wooden beads on the guide string of a knot.
 |
| Belt. |
The last step was my hair. I bought a braid head band and a package of fuse on hair. The hair was in two bunches, so I cut off the fuse tops and braided each bunch so I got two small braids to loop through my hair. I pulled back the front of my hair into a pony tail, then braided it into 4 braids. I then wrapped the outside to other my head into a headband hiding their ends under each other, I put the braided headband I bout just behind it and pinned both in place. I then took the two little braids I made and pinned them into loops on the underside of my pony tail and then I wrapped the other two braids of my own hair into a bun covering the edges of the things I had added and the ponytail holder on my own hair.
 |
| back of hair. I did it rather quickly for the pictures so I didn't manage to get everything tucked in the way I would want. |
 |
| The side view. I think I will get another braid head band to use in place of my own braids to wrap around my head, that way I can thicken up the bun as well and hide edges better. |
And finally the "completed" costume:
 |
| With flash |
 |
| Without flash |
Update, 4/24/12:
Upon submitting this for approval it was suggested that I should darken the pants to be more accurate. I redyed them in the Wine Rit for a half hour which did darken them considerably:
 |
| the newly re-dyed pants with a shoe and leg wrap. |
However I'm afraid that they are too red now, so am thinking of getting some dark blue and layering that on to even it out a bit (or another dark purple), once I get feedback from the ladies of the Senate. But we shall see what they say.
Update, 4/25/12:
I did decide to try adding the Navy Rit and while it did help I'm still not sure if it is good enough. May have to try a different brand and see if it works better:
 |
| they are a bit more plum but still not sure if they are dark enough. |
Update, 4/26/12:
I tried dying it once more, this time I used iDye Poly which did seem to work a bit - as it is a little darker, but I'm still not sure if it is quite right. I used a full package of violet and a half package of brown to achieve this color.
 |
| Dye attempt 4 a bit darker... |


neato. i'm trying this one out myself. :)
ReplyDeleteAwesome, Aalya! It is super comfortable to wear. And one of the easiest I have done as far as the construction. Have fun with it!
ReplyDeleteI'm making this costume myself! It's my first try at a costume but it's turning out pretty good! And thanks for the hair idea. I wasn't sure how to do it at first!
ReplyDelete